


In today’s fast-evolving and cost conscious business environment, many organizations are seeking more cost-effective and flexible CRM solutions. This shift has led to a growing interest in migrating from Salesforce to SuiteCRM. SuiteCRM, known for its open-source nature, offers unparalleled customization, control, and cost savings as compared to Salesforce and many other CRM’s. This guide aims to simplify the migration process, leveraging personal insights and practical steps to ensure a seamless transition from Salesforce to SuiteCRM.
Why Switch from Salesforce to SuiteCRM?
Businesses are increasingly moving to SuiteCRM for several compelling reasons:
- Cost Efficiency: SuiteCRM can significantly reduce CRM costs without compromising on features or scalability. SuiteCRM has no costs per users or no cost per features like other CRM’s. You will have to host it yourself and support it (so there is some cost there). However, this is usually significantly less than per seat costs of other CRM’s.
- Customization and Flexibility: Its open-source framework allows businesses to tailor the CRM to their unique needs. SuiteCRM is relatively easy to develop in, plus the Studio feature allows many “no code” customizations like adding fields and even building entire new modules.
- Control and Ownership: SuiteCRM provides full control over your data and system, eliminating vendor lock-in. With SuiteCRM you have full control and access to your data at all times!
- Community Support: A vibrant community drives SuiteCRM’s continuous improvement and innovation. There are many users around the world who love SuiteCRM and are avid helpers on the forums. Plus, there are years of posts, instructions and code available if you only look!
Preparing for Migration
Before jumping into the migration, a thorough preparation is crucial:
- Data Assessment: Review and cleanse your Salesforce data. Determine what needs to be migrated and ensure data accuracy. This is a great time to “re-format” your data if required. For example if you have text fields that really should be dropdowns, now is the time. Also consider getting rid of fields that people don’t use or are poorly populated. For the most part, any field in Salesforce can be migrated to SuiteCRM.
- Tool and Partner Selection: Choose the right migration tools and consider partnering with experts for a smoother transition. Although this guide has some great tips, an expert who has done a migration before can be very helpful and save you time. It’s not as simple as writing a script. There are many factors to consider like re-formatting the data for dropdowns, ensuring date fields are properly formatted as well as, possibly creating new fields that serve your process better. A consultant can really help you take your CRM to the next level during a transition like this.
Step-by-Step Migration Process
1. Users
Begin by importing users to establish a foundation for linking records. Use the SuiteCRM import wizard with the exported Users.csv from Salesforce. Note: To prevent unwanted welcome emails, adjust email settings before importing. You may want to make sure outbound email is disabled so users don’t get new user messages.s
2. Accounts
Import accounts ensuring the assigned user in SuiteCRM matches the account owner from Salesforce. For accounts without parents, ensure the Parent_id field is blank to avoid errors. All accounts should have an assigned user ID which you will have matched from step 1.
3. Leads
Follow a similar approach to accounts.
For unconverted leads, remove values from convertedaccount, convertedcontact, and convertedopportunity fields. Mark the lead status appropriately before upload and format the date/time fields for date created, date modified, etc. as appropriate. Make sure all the dropdowns like “industry” contain values that are already setup in SuiteCRM… exactly!
4. Contacts
Import contacts, linking them to their respective accounts and owners as defined in Salesforce.
5. Opportunities
When importing opportunities, adjust the close date in Salesforce exports from date/time to date only. Use Excel to associate each opportunity with the correct account name through a lookup function.
6. Tasks and Notes
Tasks in SuiteCRM must specify a ParentTYPE and ParentID to correctly link to other records. For notes, create a cohesive list in Excel linking to the correct record using ParentID and related fields prior to import.
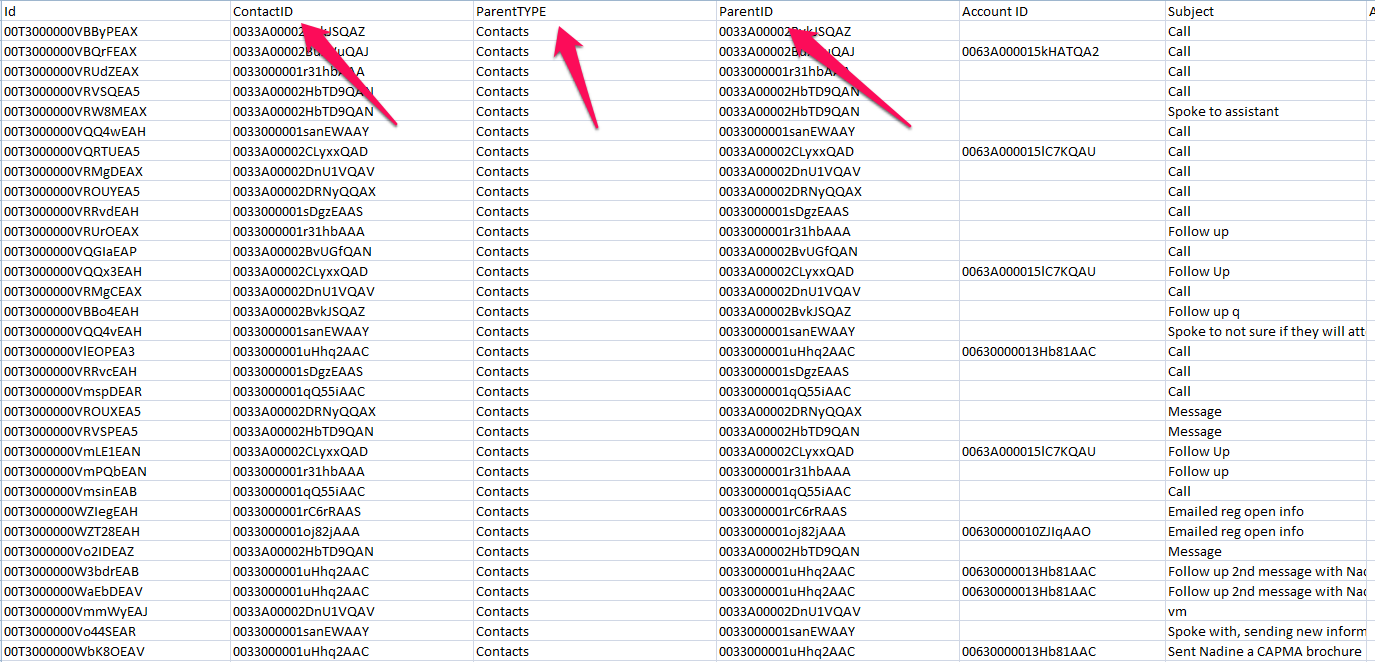
Notes have to be related to a record.
- create a list of account, opportunity, contact and lead IDs in one list.
- Relate the “ParentID” to the record of the module ie: lead, opportunity, account, contact
- Create a column in the notes import CSV for “Relatedto” and relate it to: Account, Contact, Lead, Opportunity, Contact
- Create columns for: ContactID, LeadID, OpportunityID and populate it with the “ParentID” based on the type of record it’s related to.
- Associate “Relatedto” with “Relateto” and the various ID fields on import.
This way all the records will be associated and attached to the correct record.
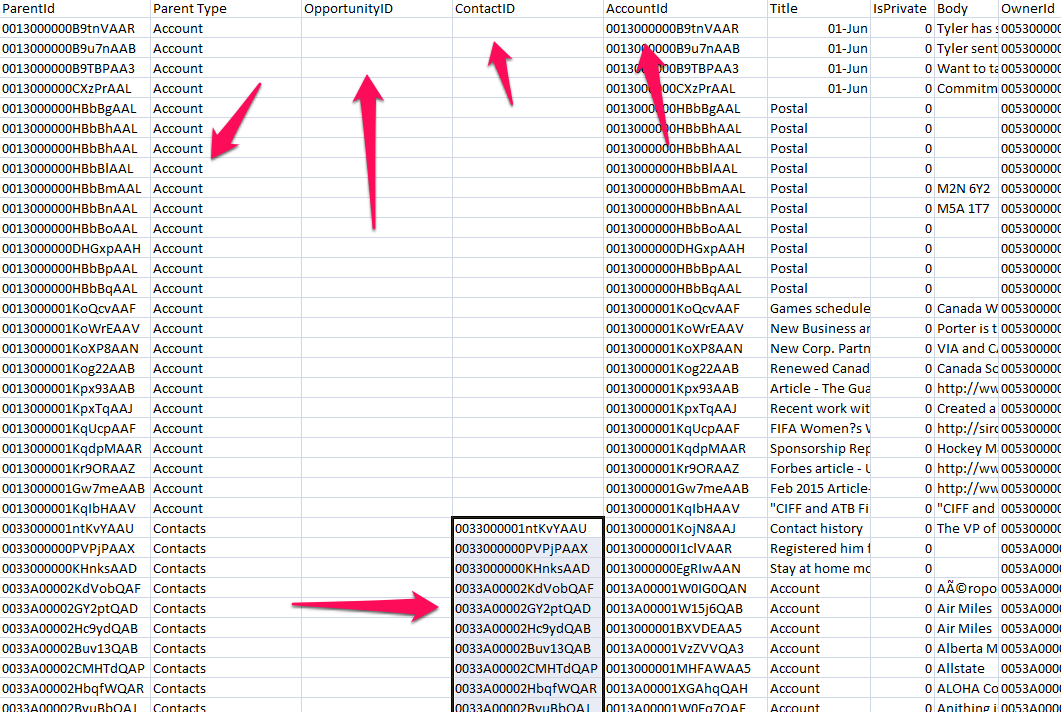
7. Attachments and Documents
Attachments must be uploaded to the “uploads” directory in SuiteCRM, then imported as notes. Ensure each attachment has a corresponding note in SuiteCRM for successful import. Documents require manual upload and database entry, following a specific process outlined in the personal notes provided.
Attachments can ONLY be uploaded as “Notes”
- You must create at least one note to have the “attachment” field available for import (bug or something).
- Also if the “attachment” field and “mime type” fields don’t show in the import wizard, go to Studio and re-save them and make sure importable=“yes”.
- You must look up “Parent ID” in a table you create of Opportunities, Acccounts, Leads, etc. this is necessary because on import SuiteCRM needs a field for “Related Module” and then you make the “Parent ID” the related to ID to get them attached to the appropriate place.
- You also have to create a field for “filename” and copy the “name” field. SuiteCRM requires both a name and file name for the record.
- Once you import attachments DO NOT DELETE THEM. Otherwise you will have to re-upload them all. Better to just update the existing records and it will leave the files on the server.
- Salesforce seems to have two records with the same filename as an Attachment and a Document. You should upload the Attachment files first, then upload the document files. Otherwise you’ll find the documents are corrupt. Attachements work without issue.
note: if the filename and file type are not available as a field in the import wizard. Go to Studio and re-save those fields and also make sure importable=“yes” and then they should be available in the import wizard.
General Import Instructions
Throughout the migration process, pay close attention to:
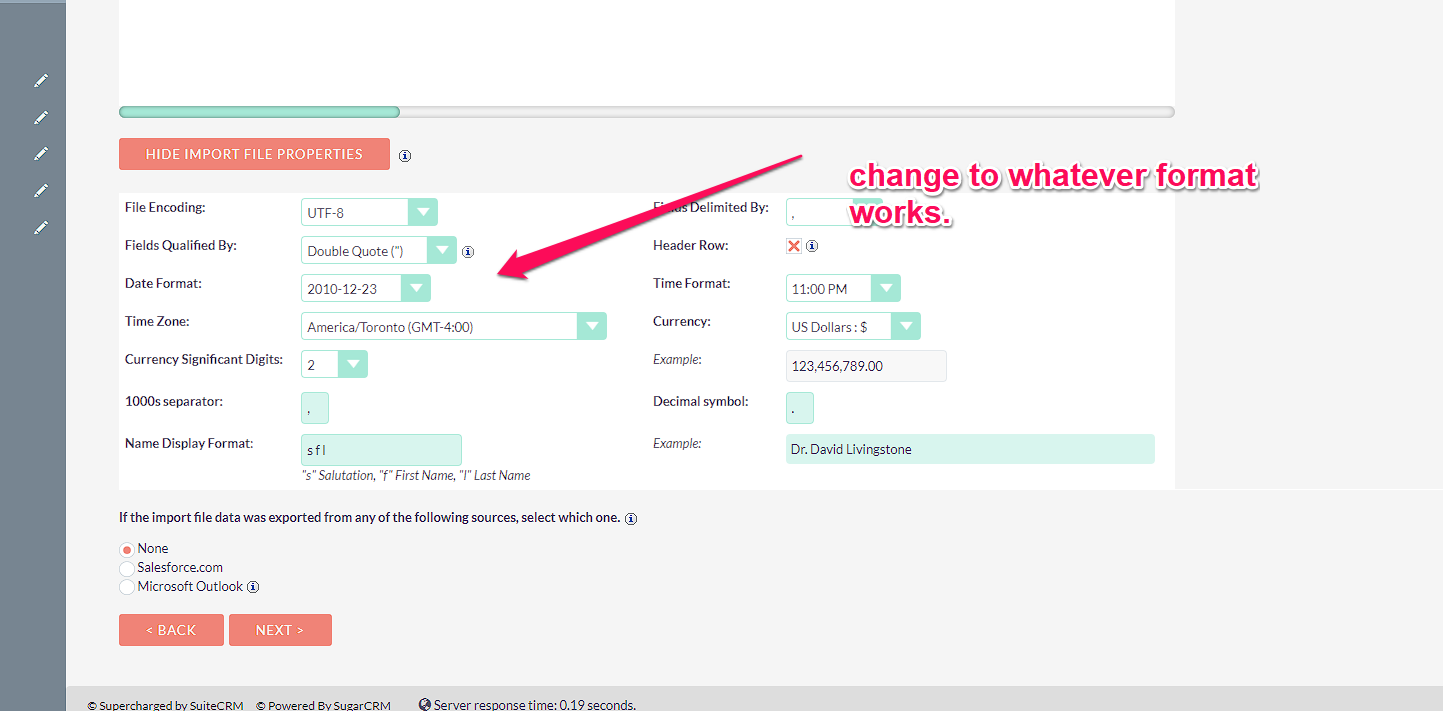
- Custom Fields and Picklists: Add any custom fields to SuiteCRM modules before importing. Ensure picklist values in SuiteCRM match those in Salesforce exports exactly.
- Save Import Mappings: After setting up your data mappings in the import wizard, save them as a template for future use, facilitating the handling of any errors or duplicates.
- Multi-Select Fields: Mulit-select fields must be separated by a comma. Like this: ^value1^,^value2^. Also there is a bug: If you get a warning when trying to import, go to /home/wysemeter/public_html/include/SugarFields/Fields/Multienum/SugarFieldMultienum.php Just go to that file and line number (which should be in your error, only you didn’t post it) and change the function header to end with $tabindex = 0) instead of just $tabindex) Do this for all occurrences in the file. Don’t forget to Repair and Rebuild after you make the change.
- Date Fields: Date fields that are date only, must be formatted in excel to remove the time stamp. Date fields in SuiteCRM that are already Date/Time fields like “date created” are OK. But all other fields that are date only must be formatted in Excel by formatting the date display to be yyyy-mm-dd, no other editing is necessary. You may also want to try changing up the date format on import.
- Issues with Relationships: You can’t import all relationships during import. For example, you can relate a call report to a contact, or an Opportunity, but you can relate a contact to an opportunity. You have to find the right table in the database where the relationship exists and add it.
- Contact/Opportunity Relationship: This is the “Role” in Opportunities. This can be found in PHPMyAdmin. Table: opportunities_contacts. This must be populated directly in PHPMyAdmin.
Other Issues and Considerations in Migration
- Price Books: SuiteCRM does not use this concept. There are Plugins, or you may wish to develop an alternate method to manage pricing.
- Forecasting: SuiteCRM does not have forecasting functionality. There are Plugins, or you may wish to develop an alternate method to manage pricing.
- Reports, Charts and Graphs: There is no way to export/import these. Custom charts, graphs and reports must be re-created in SuiteCRM.
Post-Migration Steps
After completing the migration:
- Verify Data Accuracy: Check the imported data against your records in Salesforce to ensure accuracy and completeness.
- Configure Workflows and Automations: Adjust any workflows or automation rules to fit your new SuiteCRM environment.
- Train Your Team: Provide training sessions for your team to get accustomed to SuiteCRM’s interface and functionalities.
Conclusion
Migrating from Salesforce to SuiteCRM can offer significant benefits, including cost savings, enhanced customization, and greater control over your CRM environment. By following and by, consulting with an expert, the outlined steps and preparing thoroughly, businesses can ensure a smooth transition and leverage SuiteCRM to its full potential. Here at iGo Sales and Marketing we offer SuiteCRM Consulting and SuiteCRM Development as well as training. So if you need expert advice in your transition, contact us.