


Automating recalls in SuiteCRM with workflow can be a huge time saver, ensuring you never miss a follow-up with your contacts. In this tutorial, we’ll walk you through setting up automated recalls while logging the current call, using calculated fields and workflows in SuiteCRM. This process will streamline your follow-up activities and enhance your efficiency.
What do we mean by recalls? Well, once you’ve logged a call with client or prospect, generally your next step is to setup the next call. Without this worklfow, you’d have to create a new planned call, which takes time! With this workflow you can make one easy selection and automatically create a recall scheduled for the future without any wasted time.
Prerequisites
Before you start, ensure you have the following fields created in your call module:
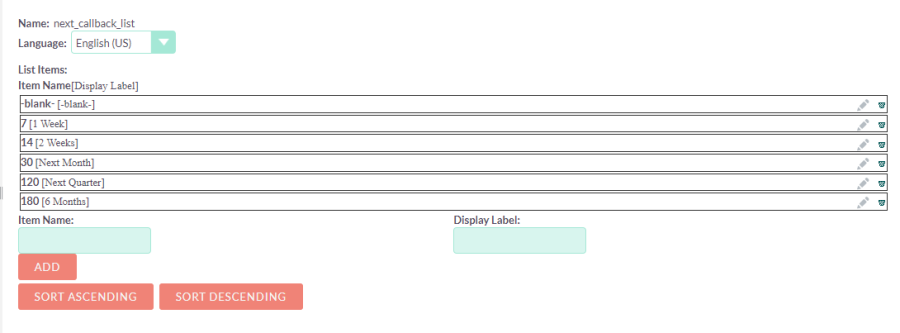
recall_date_time_c: A date/time field used for calculation. This field can be hidden as it’s only used internally.next_callback_c: A dropdown field where you define the number of days from now for the next callback.
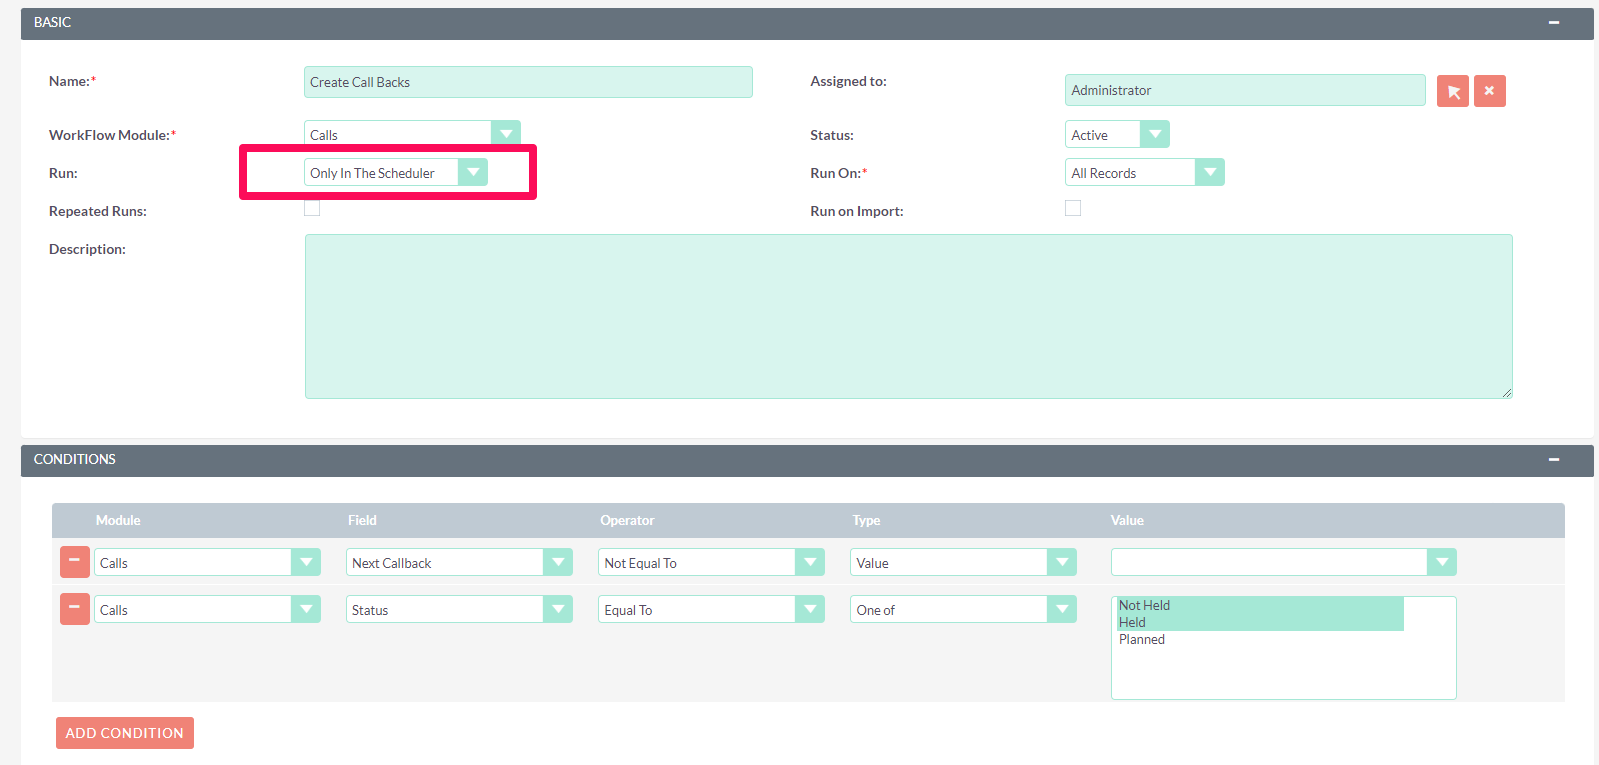
Step 1: Create the Workflow
The workflow is the core of this automation. Set up the workflow to trigger when the next callback is not equal to “blank” and the status is either held or not held. It’s essential to run this in the scheduler if you want relationships to contacts and other modules to work correctly, as they are created after saving and won’t be available to create relationships in the new record immediately.
Step 2: Calculate the Fields
Since workflows calculate fields in the existing record, not the newly created one, you’ll need to do some trickery. Here’s the step-by-step process:
- Calculate
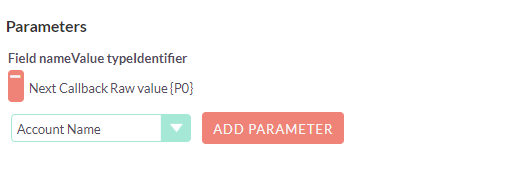
recall_date_time_c: This must be a date/time field in the existing call record. - Set the Next Call Back: Use a parameter
{P0}, which will be the number of days from now you want to schedule the call.
The formula to calculate the recall_date_time_c field considering server time differences (assuming your server time is 4 hours ahead) is:
{addDays(m/d/Y h:iA;{subtractHours(m/d/Y h:iA; {now(m/d/Y h:iA )};4)};{P0})}
For SuiteCRM 8 (with lowercase am/pm):
{addDays(m/d/Y h:ia;{subtractHours(m/d/Y h:ia; {now(m/d/Y h:ia )};4)};{P0})}
Simplified, this translates to (note this is not actual code, just a conceptualization):
codeadd days((now - 4 hours); add {P0})
Step 3: Create the New Call
Now, use the calculated value of recall_date_time_c to set up the new call:
- Set the Duration: Ensure the duration is set (e.g., “15” minutes). The workflow won’t work without setting a duration.
- Start Date: Set the start date to the
recall_date_time_cvalue you just calculated. - Populate Other Fields: Equate or populate the remaining fields as necessary.
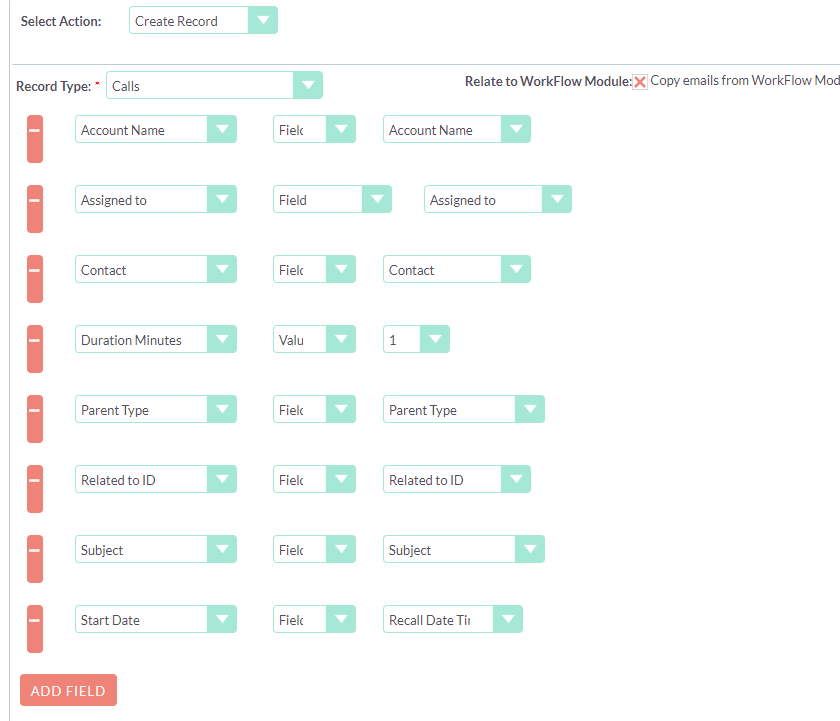
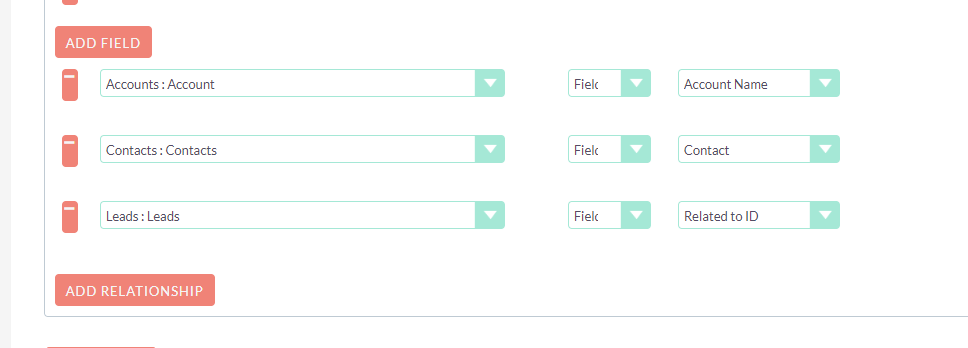
Step 4: Add the Relationships
To relate the new call to the same contact as the original call, add the necessary relationships. This ensures continuity and proper tracking of follow-up activities.
Benefits of Setting Up This Recall Workflow
Implementing automated recalls in SuiteCRM offers several advantages:
- Efficiency: Automates the process of scheduling follow-up calls, saving time and effort.
- Consistency: Ensures no contact is missed, maintaining consistent communication with your clients.
- Accuracy: Reduces the chance of human error in scheduling follow-ups.
- Streamlined Workflow: Integrates seamlessly into your existing CRM processes, enhancing overall productivity.
Watch the Complete SuiteCRM Workflow Tutorial
For a detailed walkthrough, watch the video tutorial embedded below:

Contact Us
If you need assistance with SuiteCRM development or consulting, don’t hesitate to contact us. We’re here to help you optimize your CRM workflows and improve your sales processes.